Plumbing brings fresh water in and wastewater out. Plumbers Woodland Hills is a crucial part of new construction.
You must install the plumbing before you can finish your bathroom, kitchen, or laundry room. This is called the rough-in stage. During this time, plumbers must lay pipes underground and in walls. This process is generally done before drywall and other finishes are installed.
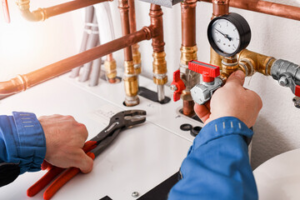
Supply lines bring water from your home’s permanent pipes to faucets, toilets, icemakers, dishwashers, and other appliances. Water supply lines are usually copper or CPVC (cross-linked polyethylene) tubing, although specialized PEX tubing that can withstand very high temperatures is also available. When choosing a water supply line, consider its price, ease of installation, durability and safety. A plumber can help you choose the best tubing for your project.
During new construction, plumbers install plumbing supply lines as part of the process called rough-in plumbing. Rough-in plumbing happens before the concrete slab is poured, and it involves the expert fitting of pipes to connect the building to the main water and waste lines. Plumbers first install waste lines, then supply lines.
Once inside the house, the main line splits into hot and cold water paths that lead to each service outlet. For example, your kitchen sink needs both a cold and hot supply line, but your toilet only requires one. Each supply line runs to a water shut-off valve, which controls the flow of water into the fixture.
Plumbers typically use thread tape to create a watertight connection when attaching a water supply line to the valve. The tape comes in several different colors and lengths, and it helps ensure a leak-free fit.
The amount of tape used is important, as well as the direction it is applied. Wrapping the tape in a clockwise direction is recommended, as it helps to prevent leaks. Wrap the tape around each thread at least five or six times.
Whether you are replacing an existing supply line or installing one for a new fixture, it’s important to make sure the connection is tight. Otherwise, you might experience low water pressure, rattling sounds or rusty areas in enclosed spaces where the line runs.
To do this, measure the distance from the water valve to the fixture. Then select a line that’s a little longer than this, so you have room to work. Also, be sure to get the right fittings for the line and fixture, as they can’t be mixed up. Using the right tool can make your job easier, too. For example, a wrench with a long reach makes it easier to turn the nuts that hold the supply line in place.
Drain lines are pipes that carry wastewater, including sewage, from your home’s plumbing fixtures to the sewer system or septic tank. These pipes are usually buried under the ground or in your basement. The type of pipe used depends on the soil conditions where it is installed. The pipe diameter also impacts the flow rate of waste water. A professional plumber can help determine the anticipated flow rates and select an appropriate size of pipe for each drain line.
When installing a new drain line, make sure it’s properly vented. A vent allows fresh air to enter the drain pipe and prevents odors from escaping into your home. A well-ventilated drain line can also extend the life of your pipes by preventing them from becoming dry and brittle over time.
Typically, indoor drain lines are PVC or ABS plastic. They connect your home’s toilets, sinks, tubs, and showers to fixture drain traps, which are also called p-traps. P-traps are curved segments of pipe that hold standing water and act as a seal, preventing sewer gases from entering your home. The p-traps are located under each fixture and connected to the rest of the drain lines with branch drain lines, which lead into the main drain line.
A main drain line is a large piping network that carries all of the wastewater from your house to the municipal sewer line or septic tank. This piping is usually 4 inches in diameter and is made from clay, cast iron, or PVC plastic. It runs horizontally, with a slight downward slope, under your home’s lowest floor and into the municipal sewer line or septic tank.
Like other drain lines, your main line plumbing and sewer lines can clog. Unlike with other types of clogs, however, you can’t just use a drain snake to unclog the main line. A clogged main line or sewer line is much more serious and requires a professional plumber.
Professionals can use specialized cameras to view the interior of your main sewer and drain lines. This gives them a clear view of the problem and enables them to make fast repairs.
Plumbing pipes don’t just carry water and waste, they also vent to keep the system operating efficiently. Without proper ventilation, clogs, overflows and foul odors can occur. Understanding how and why your plumbing vents work helps you address the most common problems with your indoor plumbing.
Plumbing vents equalize pressure in the drain system by allowing air to enter and exit, which keeps water flowing smoothly and prevents the buildup of pressure that can cause sewage back-ups. Vents reduce the noise caused by rushing water as well as unpleasant odors, and they can even help lower your energy bill.
Vents are available in a variety of styles and materials to fit your home’s needs. Most homeowners use a combination of different types working in concert. Here are the most popular options:
A true vent is a vertical pipe attached to a drain line that extends straight up through your roof. It functions as the main vent that other fixtures can connect to, and it’s usually 3 or 4 inches in diameter.
If a fixture’s location prevents it from connecting directly to the main stack, a re-vent pipe can be installed. These smaller pipes, 1 or 2 inches in diameter, attach to the drain line near specific fixtures and run up and over to connect to the main stack.
Branch vent pipes are smaller than re-vent pipes and connect to individual bathroom fixtures, such as toilets and sinks. They are designed to be a direct extension of the drain line and ensure adequate air flow in the drainage system.
Before you start your plumbing installation project, check with local authorities to determine the minimum requirements for vent size and location. Having these requirements in mind will ensure your installation complies with regulations and provides the best possible results.
After locating the main vent stack, it’s time to begin running the branch vent pipes. You’ll need a saw or pipe cutter to cut the pipes, as well as pipe straps or hangers and either a plumbing adhesive or soldering equipment to make the connections. When running a horizontal vent, it’s important to follow the guidelines for preventing sagging and bending, and to keep the piping at least 6 inches above the fixture flood level (the rim of the sink or tub, for example).
Often considered the most essential components of a plumbing system, fixtures are devices that connect to the water supply and drain lines to deliver water and direct wastewater. The most common types of plumbing fixtures include sinks, faucets, toilets, bathtubs and showers, and garbage disposals. These devices come in many different shapes, sizes and designs to meet the unique needs of residential and commercial spaces. In addition, they are available in a wide range of colors and finishes to complement the aesthetic of any space.
The installation of plumbing fixtures is divided into two stages: rough-in and finishing. The rough-in stage involves installing the plumbing system’s concealed components, such as pipes and fittings. The finishing stage is when the visible fixtures and appliances are connected to these components. The finish phase also includes testing and adjusting the fixture’s functions to ensure that they work properly.
When choosing plumbing fixtures, homeowners should consider several factors, including the material, style and design, water conservation, functionality, and price. Investing in high-quality fixtures that are made of durable materials will help them last longer and reduce the need for repairs or replacements. In addition, selecting fixtures that are energy efficient can help save on utility bills. For example, many modern faucets and toilets have features that allow them to conserve water without sacrificing performance.
It’s also important to consider the number of fixtures that will be installed in a space. For example, if a home has limited floor space, it may be necessary to install smaller-sized fixtures. Lastly, it’s critical to choose fixtures that are compatible with the existing plumbing system. This will prevent unnecessary problems such as leaks and clogs.
While there is no rule as to how many fixtures can be connected to a single vent stack, it’s generally recommended that no more than three or four fixtures share the same vent. This will prevent the buildup of pressure that can occur when too many fixtures draw air from the same vent.
Although the installation of plumbing fixtures is an important aspect of a home’s or business’s function, it is not without its challenges. Fortunately, professional plumbers are trained to handle the installation process safely and effectively. By following the tips listed above, homeowners can rest assured that their new plumbing fixtures will perform well for years to come.
Plumbing
boat dock lift builders, boat dock lift installation, boat dock lift repair, dock builders, dock building companies, dock building contractors, dock installation, dock repair, dock restoration